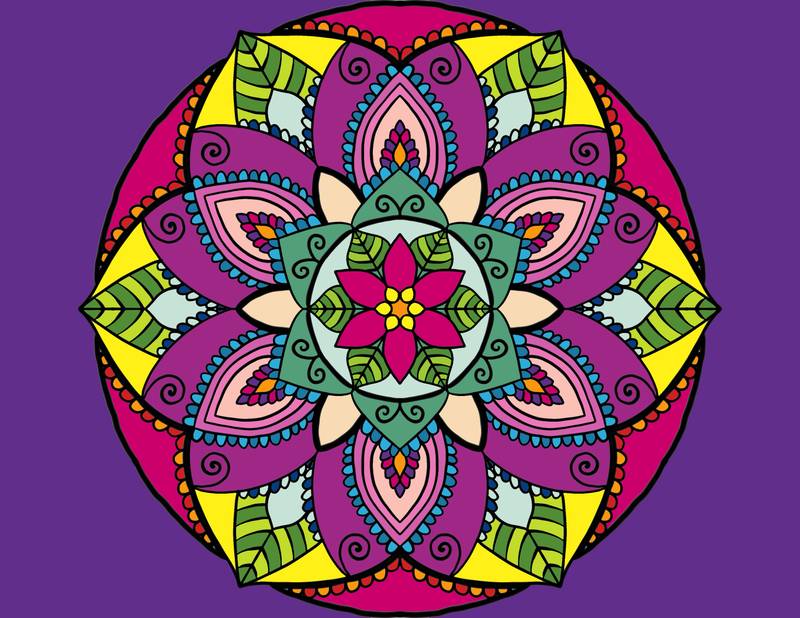
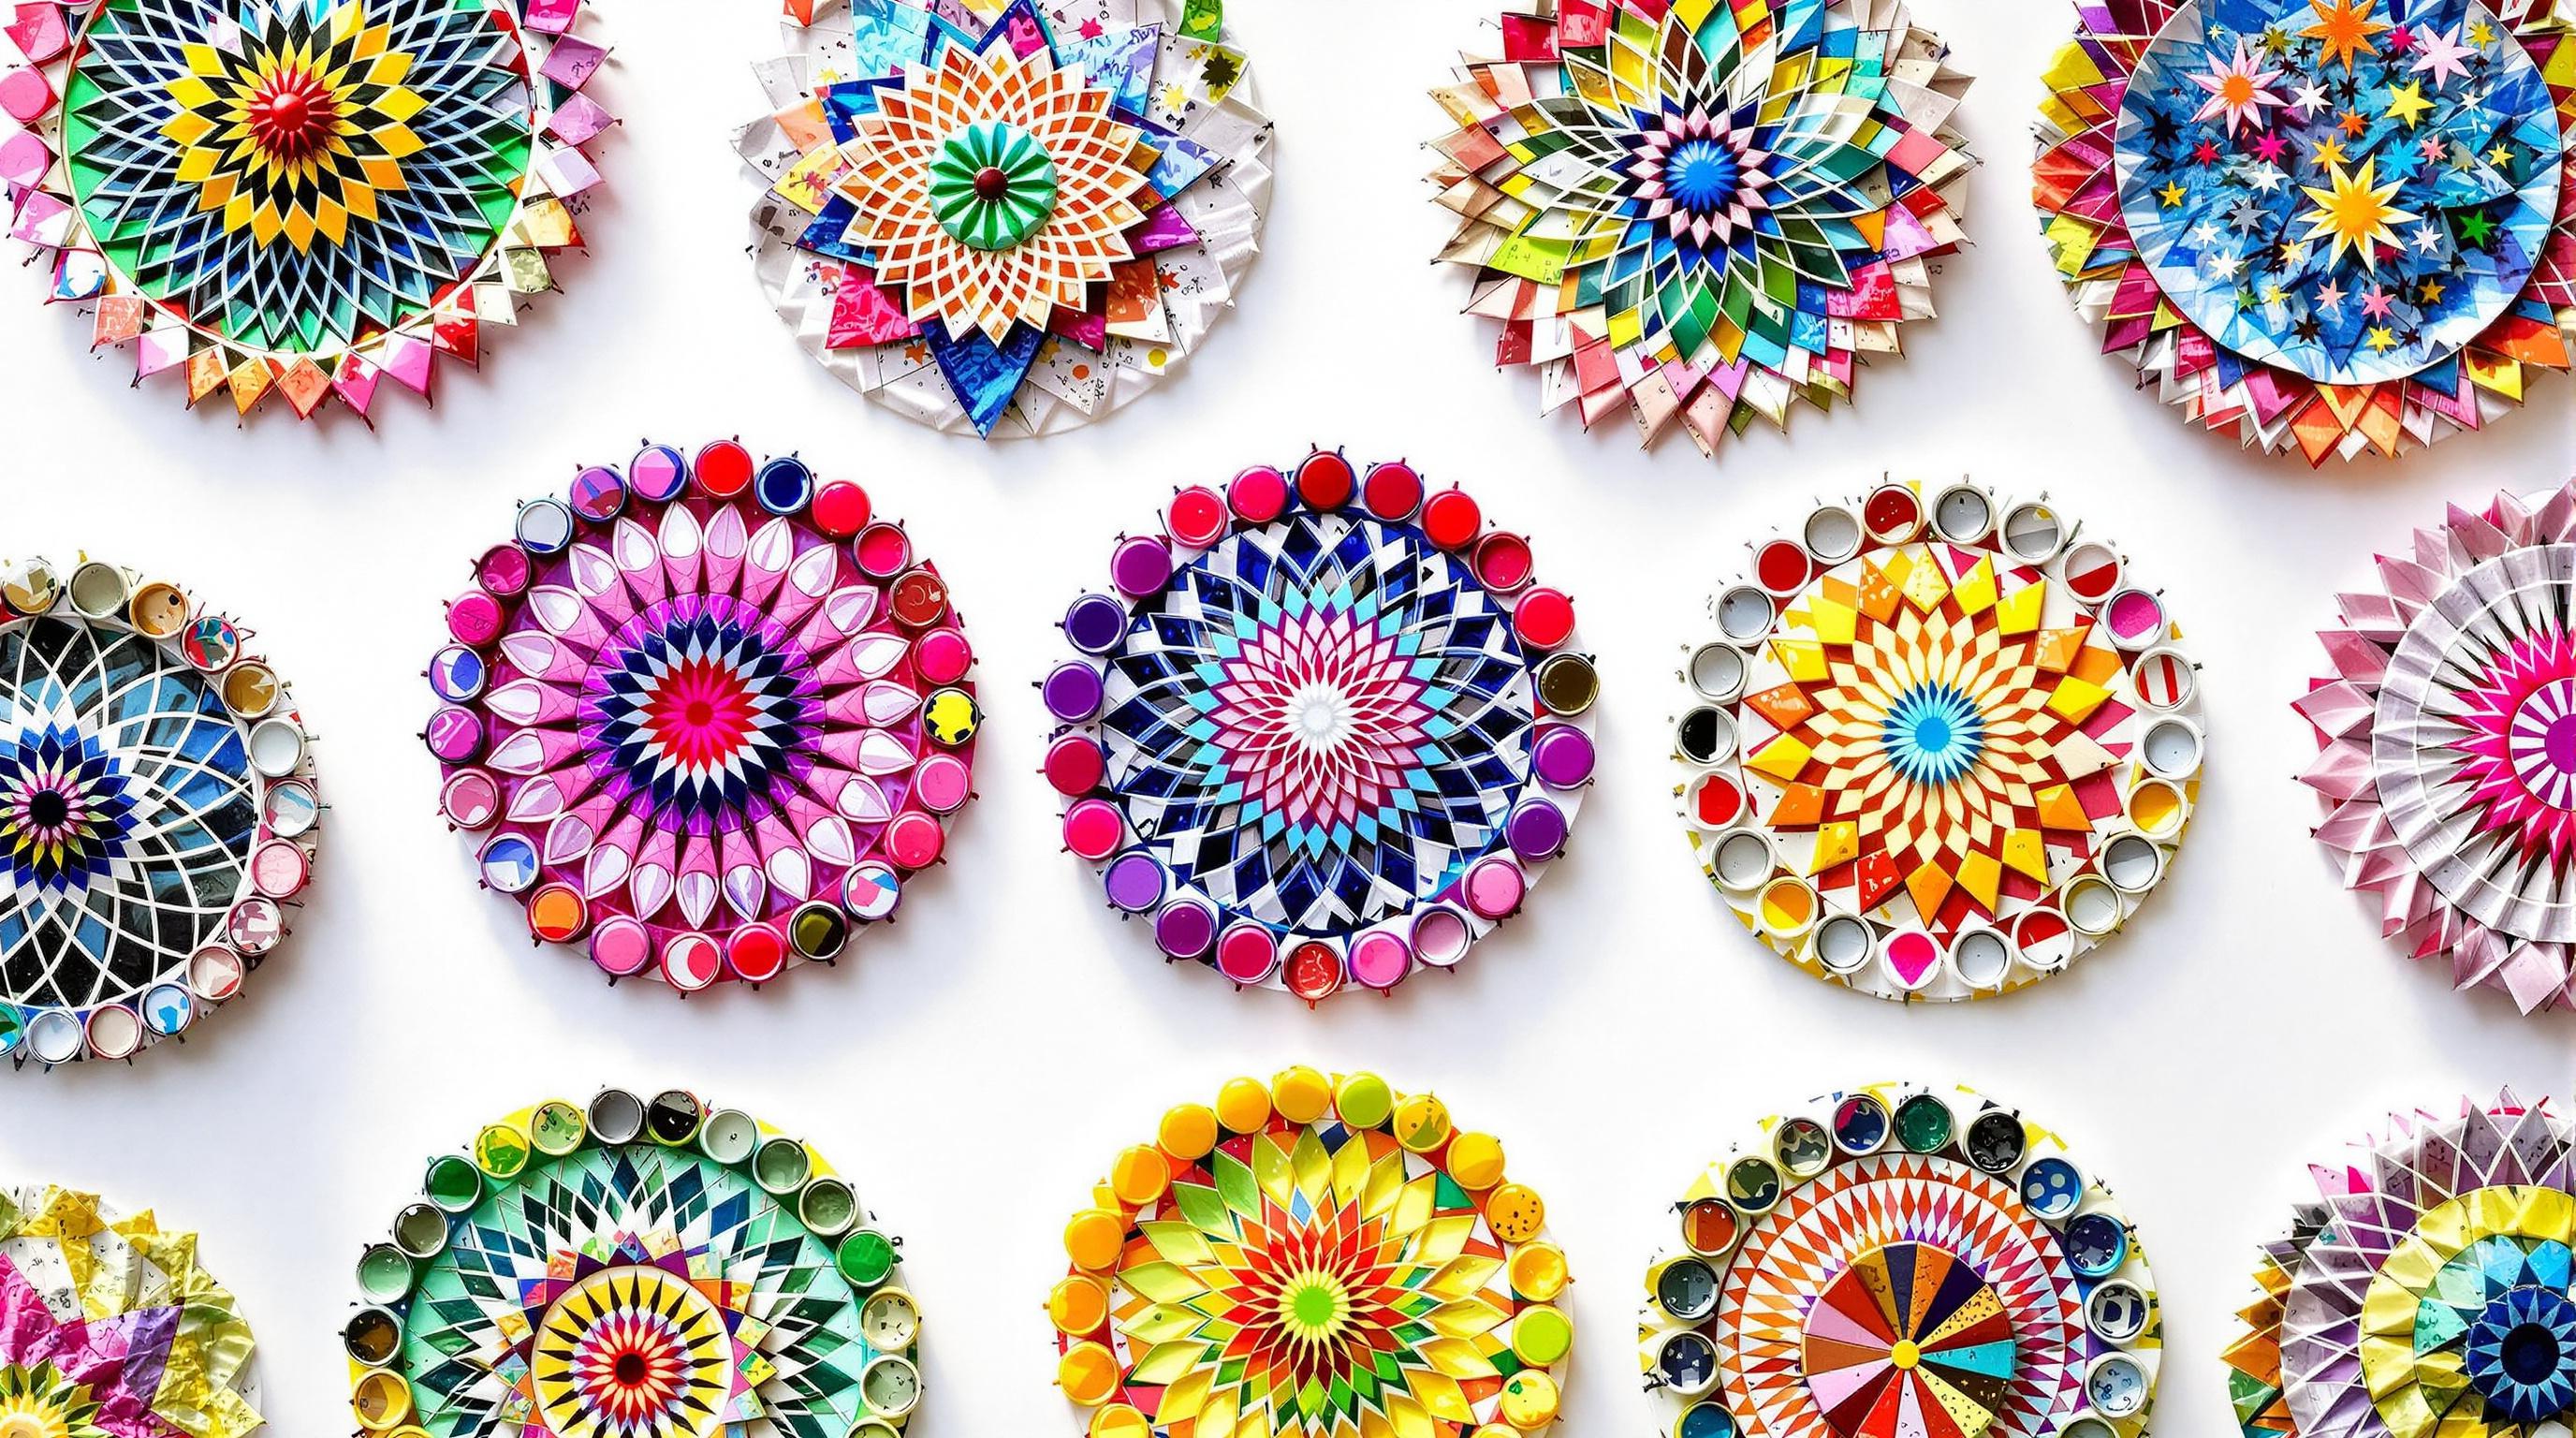
I mandala sono bellissimi disegni simmetrici che promuovono la consapevolezza e la creatività. Utilizzando materiali riciclati, puoi trasformare i rifiuti quotidiani in pezzi d'arte unici, riducendo al contempo gli sprechi. Ecco 10 idee creative per realizzare mandala con oggetti come vecchie riviste, CD, tessuti e altro ancora:
- Mandala per riviste : ritaglia e sovrapponi pagine colorate per ottenere disegni intricati.
- Mandala su CD/DVD : utilizza superfici riflettenti per creare motivi vivaci.
- Mandala in tessuto e cartone : combina tessuti e cartone per ottenere un effetto strutturato.
- Mandala con tappi di bottiglia : disponi tappi di plastica o metallo in forme geometriche.
- Mandala di giornale : arrotola e arrotola le strisce per ottenere effetti 3D.
- Mandala con cucchiai di legno : riutilizza gli utensili come arte murale .
- Mandala di dischi in vinile : dipingi disegni audaci su vecchi dischi.
- Mandala di cartone delle uova : crea motivi floreali con pezzi di cartone.
- Mandala con tappi di sughero : crea motivi circolari con i tappi di sughero.
- Mandala di circuiti stampati : trasforma i componenti elettronici in opere d'arte metalliche.
Vantaggi:
- Ecologico : riutilizzare i materiali e ridurre gli sprechi.
- Meditativo : il processo ripetitivo aiuta a ridurre lo stress.
- Personalizzabile : sperimenta colori, texture e motivi.
Che tu stia usando CD per disegni riflettenti o tappi di sughero per timbri, questi progetti combinano creatività e sostenibilità. Inizia a creare oggi stesso e trasforma i rifiuti in arte!
Crea un mandala riciclato
1. Mandala di pagine di riviste
Trasforma le tue vecchie riviste in splendidi design radiali, fondendo un'antica tradizione con l'arte moderna ed ecosostenibile. Creare mandala da pagine di riviste richiede una selezione attenta dei colori e tecniche di stratificazione.
Cosa ti servirà:
- Riviste con pagine colorate
- Forbici
- Colla
- Cartone per la base
- Un modello circolare o tracciante
Questi semplici strumenti conferiscono un tocco contemporaneo all'antica pratica della creazione di mandala, promuovendo al contempo il riciclo.
Per iniziare, traccia un cerchio sulla base di cartone e traccia leggermente delle linee che lo dividono in 8 o 16 sezioni uguali. Queste linee guida ti aiutano a posizionare i tuoi ritagli in modo uniforme.
Per un design sorprendente, pensa alle tue scelte di colore. I mandala spesso hanno significati simbolici, quindi puoi usare i colori per esprimere stati d'animo diversi:
- Monocromatico : per un look pulito e uniforme, punta sulle tonalità di un unico colore.
- Complementare : abbina i colori dei lati opposti della ruota dei colori per ottenere un contrasto più deciso.
- Analogo : utilizzare i colori uno accanto all'altro sulla ruota per ottenere un effetto uniforme e sfumato.
- Ombre : disponi i pezzi in modo da passare gradualmente dai toni chiari a quelli scuri.
Per dare profondità al tuo mandala, disponi i pezzi di carta in dimensioni decrescenti man mano che ti muovi dal centro verso l'esterno. Arriccia alcuni bordi per creare ombre e texture. Applica la colla con parsimonia per evitare di sgualcire o deformare la carta.
Lavorate verso l'esterno partendo dal centro, seguendo la simmetria radiale tipica dei mandala tradizionali. Per trovare ispirazione, date un'occhiata agli intricati modelli di mandala di Blululi . Questo metodo non solo riutilizza vecchi materiali, ma canalizza anche le qualità calmanti e meditative associate alla creazione di mandala.
2. Vecchi CD e DVD artistici
I CD e i DVD non sono solo reliquie tecnologiche; offrono una superficie unica e riflettente, perfetta per creare mandala mozzafiato. Riutilizzando questi dischi, puoi creare design accattivanti mentre ti godi il rilassante processo di creazione dei mandala.
Cosa ti servirà:
- CD o DVD usati
- Pennarelli acrilici
- Pennarelli permanenti a punta fine
- Alcol denaturato e tamponi di cotone
- Spray sigillante trasparente
Prima di iniziare, pulisci i dischi con alcol denaturato per rimuovere eventuali etichette o residui, quindi lasciali asciugare completamente [1] . La superficie riflettente aggiunge un ulteriore livello di creatività al tuo design:
| Trattamento superficiale | Effetto sul design |
|---|---|
| Aree non verniciate | Crea accenti scintillanti |
| Vernice trasparente | Aggiunge un aspetto luminoso e stratificato |
| Vernice opaca | Offre modelli audaci e distintivi |
Lavora dal foro centrale verso l'esterno, suddividendo il tuo design in sezioni gestibili. Se sei alle prime armi, abbozza leggermente il tuo design con una matita per guida [3] . Le idee di design più diffuse includono:
- Forme geometriche radianti
- Motivi punteggiati per la consistenza
- Motivi di petali e foglie
- Disegni ispirati alla geometria sacra
Una volta asciutto lo strato di base di vernice, usa pennarelli permanenti a punta fine per aggiungere dettagli intricati. Combinare vernici traslucide e opache può creare profondità e dimensione nella tua opera d'arte.
Consiglio da professionista: rifinisci il tuo mandala con uno strato di spray sigillante trasparente e resistente ai raggi UV. Questo non solo protegge il tuo design da graffi e umidità, ma mantiene anche i colori vivaci nel tempo.
Appendi il tuo pezzo finito vicino a una finestra e guarda la luce del sole trasformarlo in una mostra di arcobaleni in movimento. Molti artisti, compresi quelli di Blululi, impreziosiscono i loro design con tocchi metallici per amplificare gli effetti di luce. Questi mandala CD sono una splendida miscela di creatività e consapevolezza.
3. Progetti tessili e di cartone
I tessuti apportano un elemento pratico alla creazione di mandala eco-friendly , basandosi sui concetti di trasformazione di carta e dischi. L'uso di materiali di uso quotidiano come tessuto e cartone non solo stimola la creatività, ma supporta anche la riduzione degli sprechi attraverso il riutilizzo artistico.
Introduzione ai materiali
Per texture varie, scegli tessuti resistenti come il denim o il feltro [1] [13] . Usa cartone ondulato, come quello delle scatole di spedizione, come base robusta per il tuo design.
Fasi di preparazione
- Stirare i ritagli di tessuto per eliminare le pieghe.
- Taglia il cartone nella forma desiderata.
- Applicare un rinforzo ai tessuti morbidi per renderli più facili da lavorare [11] .
Aggiungere livelli e texture
Combina la manipolazione del tessuto con la stratificazione del cartone per ottenere un aspetto 3D. Tecniche come piegare, plissettare o intrecciare i tessuti possono aggiungere movimento al tuo design. Abbina tessuti sottili a cartone strutturato per contrasti sorprendenti [8] .
Ecco alcune idee per la stratificazione:
- Utilizzare strisce arrotolate di tessuto o cartone.
- Aggiungere sezioni di cartone rialzate per dare profondità.
- Intrecciare le strisce di tessuto attraverso le fessure del cartone.
Tecniche avanzate per effetti unici
Porta il tuo design oltre con l'avvolgimento del tessuto, un processo rilassante in cui strisce di tessuto vengono avvolte attorno a una corda per creare motivi a spirale [8] .
Puoi anche arricchire il tuo mandala con:
- Punti di ricamo su aree di tessuto.
- Bottoni o perline riciclati per dare un tocco di stile.
- Pittura per tessuti per motivi dettagliati.
- Perforazioni nel cartone per aggiungere consistenza [3] .
Ritocchi finali
Monta il pezzo finito su un robusto pannello di supporto per assicurarti che mantenga la sua forma nel tempo.
Consiglio da professionista: prova a mescolare materiali diversi mantenendo il design equilibrato. Questo metodo non solo promuove la sostenibilità, ma enfatizza anche i motivi ripetitivi centrali nell'arte dei mandala .
4. Modelli di tappi di bottiglia
Ispirati dai metodi di stratificazione tessile, i tappi delle bottiglie offrono un'opzione rigida per creare disegni geometrici precisi. Ogni tappo riutilizzato devia circa 2,5 grammi di plastica dalle discariche [14] , trasformando i rifiuti quotidiani in accattivanti opere d'arte mandala.
Materiali di cui avrai bisogno
Raccogli queste forniture:
- Una base solida (come compensato o pannello MDF)
- Adesivo forte (come epossidico o adesivo da costruzione)
- Una varietà di tappi e coperchi per bottiglie
- Strumenti di base (compasso, righello, matita)
- Dispositivi di protezione (guanti, protezione degli occhi) [14]
Iniziare
Prima di iniziare, pulire accuratamente i tappi delle bottiglie, rimuovere eventuali rivestimenti e ordinarli in base alle dimensioni o al colore [10] . Se si lavora con tappi di metallo, carteggiare i bordi taglienti per una manipolazione sicura.
Suggerimenti di progettazione
Per motivi precisi, usa la ripetizione angolare (come angoli di 45° o 60°). Per aggiungere profondità, prova ad impilare i tappi per un effetto a strati.
Aggiungere colore e consistenza
Rendi il tuo design unico:
- Combinando finiture opache e lucide o aggiungendo tappi verniciati o metallici per creare contrasto
- Incorporare tappi trasparenti o traslucidi come accenti [5]
Passaggi finali
Per rendere il tuo mandala più durevole, sigillalo con resina trasparente. Questo non solo protegge l'opera d'arte, ma le conferisce anche una finitura lucida che mette in risalto i colori [6] .
L'installazione "Close the Loop" dell'artista Mary Ellen Croteau è un ottimo esempio del potenziale creativo dei mandala realizzati con tappi di bottiglia nell'arte ambientale.
Suggerimento: collabora con i bar locali o i centri comunitari per raccogliere tappi [12] . Il processo pratico di sistemazione dei tappi può aumentare la concentrazione, proprio come la tradizionale meditazione mandala. Per un risultato raffinato, prendi ispirazione dai design migliorati digitalmente di Blululi: i mandala con tappi di bottiglia sigillati possono trasformare materiali semplici in arte di qualità professionale.
5. Mandala 3D di giornale
Le strisce di giornale sono un materiale versatile che può essere modellato in intricati disegni organici. Trasformando i titoli di ieri in arte mandala tridimensionale, puoi creare pezzi accattivanti che conferiscono consistenza e profondità al tuo spazio. Questo approccio combina l'intramontabile artigianato del quilling di carta con moderne tecniche di riciclo.
Di cosa avrai bisogno
| Essenziali | Tocchi opzionali |
|---|---|
| Giornali | Colori acrilici |
| Colla per bricolage | Penne metalliche |
| Forbici | Perline colorate |
| Strumento per quilling | Cornice decorativa |
Per iniziare: la base
Tagliare il giornale in strisce uniformi da 1/2 pollice lungo le linee del testo per una maggiore resistenza. Iniziare abbozzando il disegno del mandala direttamente sul tuo spazio di lavoro per guida [1] .
Come dare forma al tuo design
Ecco alcune forme chiave da padroneggiare:
- Bobine strette : cerchi compatti formati arrotolando strettamente le strisce.
- Lacrime : spirali pizzicate che aggiungono varietà.
- Elementi con frange : strisce con bordi tagliati per una maggiore consistenza.
- Pieghe geometriche : forme strutturate per motivi intricati.
Stratificazione per dimensione
Inizia dal centro e procedi verso l'esterno, creando strati in cerchi concentrici. Lascia asciugare completamente ogni sezione prima di passare alla successiva per evitare distorsioni.
Ritocchi finali
Una volta che il pezzo è completamente asciutto, maneggiatelo con cura per preservarne la struttura e i dettagli [8] .
Suggerimenti Pro
Organizza il tuo spazio di lavoro per mantenere i tuoi materiali in ordine e i tuoi modelli precisi [11] .
I mandala di giornale sono più che semplici elementi decorativi; trasformano materiali semplici in arte significativa. I frammenti di testo esposti di carta da giornale sbiadita aggiungono una storia visiva unica a ogni pezzo. Inoltre, il processo di avvolgimento ripetitivo si allinea magnificamente con l'essenza meditativa dei mandala tradizionali.
6. Arte murale con cucchiaio di legno
Trasforma i vecchi utensili da cucina in accattivanti opere d'arte da parete creando intricati disegni mandala . Cucchiai di legno e altri utensili possono aggiungere profondità e consistenza al tuo arredamento.
Di cosa avrai bisogno
| Materiali di base | Extra opzionali |
|---|---|
| Cucchiai e utensili in legno | Vernici acriliche o finiture metalliche |
| Robusta tavola di legno o tela | Tinture per legno per un aspetto lucido |
| Adesivo forte (come E6000 ) | Sigillante protettivo trasparente |
| Carta vetrata | Perline decorative o piccoli accenti |
Preparazione dei materiali
Inizia levigando eventuali bordi ruvidi sugli utensili per garantire superfici lisce. Scegli una tavola di legno o una tela resistente come base: deve reggere il peso del tuo design [4] .
Organizzazione e assemblaggio del tuo progetto
Disponi il tuo progetto prima di incollarlo. Usa utensili più grandi per formare la struttura esterna e riempi il centro con pezzi più piccoli per dettagli più intricati [10] . Una volta che sei soddisfatto del layout, fissa gli utensili con un adesivo forte come E6000. Se il tuo progetto è pesante, potresti voler aggiungere delle staffe per un supporto extra [4] .
Aggiungere tocchi personali
- Abbina i toni naturali del legno con accenti verniciati o metallici per creare contrasto.
- Utilizzare piccole perline di legno o altri elementi decorativi nei punti chiave per aggiungere consistenza [15] .
Questo processo pratico non solo crea un pezzo sorprendente, ma sfrutta anche la natura calmante e meditativa della creazione di mandala.
Rifinitura e protezione delle tue opere d'arte
Sigilla il tuo pezzo completato con una vernice trasparente per proteggerlo da polvere e umidità [7] . Per le opere d'arte esposte nelle cucine, opta per una finitura resistente all'acqua.
sbb-itb-b6c1dc0
7. Mandala di dischi in vinile
I dischi in vinile offrono una superficie più ampia e strutturata, perfetta per i disegni mandala . Le loro scanalature e la forma circolare si prestano naturalmente alla creazione di motivi intricati.
Materiali di cui avrai bisogno
| Forniture di base | Extra opzionali |
|---|---|
| Vecchi dischi in vinile | Vernici acriliche metallizzate |
| Colori acrilici | Pennarelli per pittura |
| Pennelli a punta fine | Sigillante acrilico trasparente |
| Matita |
Preparazione della superficie
Per assicurarti che la vernice aderisca bene, inizia pulendo il disco. Usa lo stesso metodo di pulizia descritto per CD/DVD nella Sezione 2. Se la superficie è lucida, carteggiala leggermente per aiutare la vernice ad aderire meglio [2] . Puoi anche applicare uno strato sottile di primer gessoso se necessario. Per disegni precisi, dividi il disco in sezioni uguali usando un compasso o un goniometro prima di abbozzare il tuo mandala [11] .
Creazione del tuo design
La superficie nera dei dischi in vinile offre uno sfondo sorprendente. Usa l'etichetta originale del disco come elemento centrale del tuo design [8] . Applica sottili strati di vernice per una migliore adesione e una finitura più liscia [1] .
Idee di colore:
- Bianco e metallizzato : contrasto elevato e accattivante
- Colori complementari : audaci e vibranti
- Colori analoghi : aspetto liscio e coeso
Incorpora i solchi del disco nel tuo design per aggiungere texture. Utilizza strumenti come strumenti per punteggiatura o manici di pennello per creare motivi precisi. Per una maggiore dimensione, prova:
- Stratificazione delle vernici per la profondità
- Aggiungere riflessi metallici per un tocco riflettente
- Integrare l'etichetta centrale nel tuo design
- Utilizzo di stencil per applicare motivi digitali migliorati da Python, ispirati alle tecniche di Blululi
Ritocchi finali e idee di visualizzazione
Una volta completato il progetto, prendi in considerazione queste opzioni di visualizzazione:
- Incornicia il disco per appenderlo a una parete
- Trasformalo in un mobile sospeso
- Utilizzalo come parte di un'installazione multimediale
- Rendilo un centrotavola unico
Gli accenti metallici possono esaltare le qualità riflettenti del vinile, in modo simile a come Blululi usa gli effetti luminosi nella grafica dei CD.
Suggerimenti Pro
Per mantenere la simmetria, tracciare delle linee guida leggere con una matita prima di iniziare. Concentrarsi su una sezione alla volta, ripetendo attentamente i pattern [11] . Questo metodo si basa sui concetti di riflessione della luce della Sezione 2, pur rimanendo fedele alla natura equilibrata e simmetrica dei mandala.
8. Motivi floreali sui cartoni delle uova
Trasforma i normali cartoni delle uova in accattivanti disegni mandala con questo approccio creativo. La superficie strutturata dei cartoni delle uova aggiunge profondità e dettagli ai tuoi motivi floreali, strizzando l'occhio anche all'artigianato eco-consapevole. Questa tecnica trae ispirazione dalle idee di quilling sui giornali nella Sezione 5, ma offre un tocco più dimensionale.
Materiali di cui avrai bisogno
| Forniture di base | Extra opzionali |
|---|---|
| Pulisci i cartoni delle uova | Glitter o paillettes |
| Forbici o taglierino | Vernici metallizzate |
| Vernice acrilica | Vernice dimensionale |
| Colla forte per lavori artigianali | Sigillante o vernice |
| Base circolare |
Per iniziare: taglio e preparazione
Per prima cosa, pulisci e asciuga bene i tuoi cartoni delle uova. Usa le forbici per tagliare le singole coppette, rifilando i bordi a forma di petalo. Appiattisci leggermente i fondi per renderli più facili da incollare, mantenendo intatte le loro curve naturali [1] . Questo processo di taglio ripetitivo può essere calmante, perfetto per entrare in contatto con l' aspetto meditativo dell'arte dei mandala menzionato in precedenza.
Sperimenta diversi tipi di petali tagliando i bordi smerlati, appuntiti o sfrangiati.
Assemblaggio del tuo progetto
Inizia dal centro della base e procedi verso l'esterno in strati circolari. Disponi prima i pezzi senza colla per testare diversi modelli e schemi di colori [1] [2] .
Aggiungere colore e consistenza
Rendi il tuo design più accattivante provando:
- Pittura sfumata che sfuma verso l'esterno dal centro
- Vernice metallizzata per accenti sorprendenti
- Elementi misti come ritagli di tessuto per aggiungere consistenza
Suggerimenti per la durata
Per mantenere intatta la tua opera d'arte:
- Utilizzare colla forte per lavori artigianali o colla a caldo per un'adesione sicura
- Monta il tuo progetto su materiali resistenti come il legno
- Conservare al riparo dalla luce solare diretta [1] [11]
- Incornicia i pezzi delicati dietro un vetro per una protezione extra
Ritocchi finali
Porta la tua creazione a un livello superiore:
- Montandolo su una tela dipinta per un effetto 3D
- Incorporandolo in installazioni artistiche multimediali
- Evidenziandolo con l'illuminazione direzionale, simile alle tecniche utilizzate per l'arte del CD nella Sezione 2
9. Disegni di stampa su tappi di sughero
Trasforma i tappi di sughero in divertenti strumenti per creare motivi mandala . Questo progetto pratico si basa sugli aspetti 3D dell'arte dei cartoni delle uova (vedere la Sezione 8) e introduce le tecniche di timbratura.
Di cosa avrai bisogno
| Nozioni di base | Extra opzionali |
|---|---|
| Tappi per vino | Vernici metallizzate |
| Vernice acrilica | Taglierino |
| Base circolare | Elastici |
Come realizzare i tuoi timbri in sughero
Inizia pulendo e asciugando i tappi. Tagliane alcuni a forma di cuneo o legane alcuni insieme con elastici per creare timbri personalizzati. Proprio come con i modelli di tappi di bottiglia nella Sezione 4, disporre i tappi in modo ponderato è fondamentale per creare design coerenti.
Costruisci il tuo Mandala
Usa una tavolozza per ricoprire uniformemente i tuoi timbri di sughero con la vernice. Inizia a timbrare dal centro della base, procedendo verso l'esterno con motivi circolari. Applica una pressione costante per ottenere stampe nitide. Lascia asciugare completamente ogni strato prima di aggiungerne di nuovi per evitare sbavature.
Suggerimenti per una timbratura più pulita:
- Quando si cambia colore, pulire i tappi di sughero.
- Prima di iniziare, testare la pressione del timbro su un pezzo di carta.
Aggiungere livelli e texture
Rendi il tuo design unico:
- Mescolare diverse dimensioni di sughero per variare.
- Utilizzo di vernici metallizzate per evidenziare determinate aree.
- Lasciando un po' di spazio negativo per l'equilibrio.
- Timbri sovrapposti per motivi intricati.
Alternative ecologiche
Scegli vernici a base vegetale per allinearti alle pratiche artistiche sostenibili. Queste vernici offrono colori audaci e sono migliori per il pianeta.
Dove utilizzare i tuoi progetti
Le stampe finite possono essere incorniciate come opere d'arte da parete, trasferite su tessuto per federe o trasformate in carta da regalo unica nel suo genere. Il processo di timbratura ripetitiva può anche essere un'attività calmante e meditativa, simile ai benefici dei mandala delle pagine delle riviste discussi nella Sezione 1.
10. Arte del circuito stampato
Trasforma i vecchi componenti elettronici in accattivanti motivi mandala metallici . Questa tecnica porta l'idea di riutilizzare i rifiuti a un altro livello, trasformando la tecnologia scartata in un'opera d'arte murale unica nel suo genere che evidenzia la nostra connessione con l'elettronica [9] .
Materiali e sicurezza
| Materiali e strumenti | Attrezzatura di sicurezza |
|---|---|
| Schede di circuito | Occhiali e guanti di sicurezza |
| Resistori e condensatori | Ventilatore di ventilazione |
| LED e microchip | |
| Tronchesi e pinze | |
| Alcool isopropilico | |
| Materiale di base robusto |
Processo di preparazione
Inizia pulendo accuratamente tutti i componenti e levigando eventuali bordi taglienti. Questo attento processo di smontaggio è simile all'approccio consapevole utilizzato nella creazione di mandala di pagine di riviste (Sezione 1). Lavora sempre in uno spazio ben ventilato e indossa indumenti protettivi [10] .
Approccio alla progettazione
Disporre i componenti in modelli mandala radiali. Per ottenere equilibrio e simmetria, seguire questi suggerimenti di progettazione:
- Posizionare i componenti più grandi al centro.
- Per un flusso visivo fluido, utilizzare una progressione graduale delle dimensioni.
- Raggruppa i componenti in base al colore per migliorare l'aspetto generale del design.
Suggerimenti per il montaggio
Usa una colla speciale per fissare gli elementi di illuminazione e assicurarti che tutto resti al suo posto. Prenditi il tempo necessario per mantenere simmetria ed equilibrio mentre assembli il tuo progetto [3] .
Aggiungere l'illuminazione
Aggiungi un tocco dinamico incorporando l'illuminazione. Puoi usare strisce LED a bassa tensione dietro il pezzo o riutilizzare LED funzionanti dalle schede dei circuiti stessi [14] .
Protezione e visualizzazione
Mantieni il tuo pezzo finito lontano dalla luce solare diretta per preservarne i colori. Montalo saldamente per proteggere i componenti delicati da eventuali danni [7] .
Impatto ambientale
Come i progetti sui tappi di bottiglia e sui CD, questa tecnica trasforma specifici tipi di rifiuti in arte significativa. Ogni mandala infonde nuova vita in una tecnologia obsoleta, unendo creatività e sostenibilità [1] .
Variazioni creative
Per un look moderno, monta il tuo mandala su acrilico trasparente o su alloggiamenti tecnologici riutilizzati [5] . Sperimenta con componenti placcati in oro per aggiungere un tocco di eleganza e contrasto visivo [8] .
Regole di base per la progettazione di mandala
Per realizzare mandala con materiali riciclati sono necessari alcuni principi di progettazione fondamentali per garantire che siano sia visivamente accattivanti che strutturalmente solidi. Questi suggerimenti ti aiuteranno a trasformare oggetti scartati in straordinarie opere d'arte.
Fondazione e struttura
Inizia con una base solida che possa supportare il peso e la consistenza dei materiali scelti. Dividi il tuo cerchio in sezioni uguali, assicurandoti che le divisioni corrispondano alla quantità e al tipo di materiali che hai a disposizione [1] . Questo metodo funziona sia che tu stia usando vecchie riviste, circuiti stampati o qualsiasi altro materiale.
Disposizione dei materiali
Organizza i tuoi materiali in base a dimensione e tipo prima di iniziare. Mantieni una spaziatura uniforme tra gli elementi, circa 1/4 o 1/3 della larghezza del modello, in modo che il design non sembri troppo affollato [11] [10] . Usa forme geometriche semplici come punto di partenza, quindi aggiungi dettagli più piccoli man mano che procedi verso l'esterno.
Aggiungere profondità
Per rendere il tuo mandala più dinamico, varia l'altezza e la consistenza dei materiali. La sovrapposizione degli elementi non solo crea un senso di profondità, ma aggiunge anche stabilità complessiva al design [1] [2] .
Regole di simmetria
La simmetria è fondamentale per i mandala. Perfeziona una sezione del tuo disegno, quindi replicala nelle altre divisioni per mantenere l'equilibrio [11] [14] .
Adattamento a materiali diversi
Adatta il tuo approccio in base al tipo di materiali che stai utilizzando:
- Gli oggetti piatti come la carta o il cartone funzionano bene se disposti a strati.
- Per ottenere un effetto audace, è possibile raggruppare insieme oggetti rotondi, come tappi di bottiglia o CD.
- Gli elementi lineari come fili o corde devono essere disposti radialmente per ottenere un aspetto pulito e organizzato.
Come esporre e proteggere la tua arte
Esporre e proteggere correttamente i mandala in materiale riciclato aiuta a preservarne il colore e la struttura nel tempo. Questi suggerimenti si basano su precedenti consigli specifici sui materiali, concentrandosi tuttavia su esposizione e protezione su misura per l'arte riciclata.
Suggerimenti per il montaggio
Scegli metodi di esposizione che siano in linea con la natura riciclata della tua arte. Le cornici usate funzionano bene a questo scopo. Per i mandala di carta , usa strisce adesive che non causino danni. Le creazioni più pesanti, come quelle fatte con tappi di bottiglia o CD, hanno bisogno di ganci per quadri resistenti [1] . Le scatole delle ombre sono un'ottima opzione per i mandala 3D , offrendo una protezione extra per le parti fragili [9] .
Protezione contro i danni
Per proteggere i mandala su carta, applicare uno spray privo di acidi [8] . Gli elementi tessili possono essere schermati con spray protettivi per tessuti per tenere a bada l'umidità. Per le parti metalliche, uno strato sottile di sigillante per metalli aiuta a prevenire l'ossidazione [14] .
Illuminazione e posizionamento
Usa l'illuminazione per migliorare l'attrattiva visiva dei tuoi mandala. L'illuminazione direzionale funziona particolarmente bene per pezzi realizzati con CD o circuiti stampati, creando riflessi e ombre sorprendenti [3] .
| Visualizza posizione | Protezione consigliata |
|---|---|
| Spazi abitativi | Vetro resistente ai raggi UV |
| Bagno | Guarnizione resistente all'umidità |
Conservazione e pulizia
Quando non sono esposti, conservare i mandala in scatole prive di acidi per evitare danni. Pulirli con spazzole morbide o aria compressa per evitare graffi. Conservarli in un luogo fresco e asciutto, lontano dalla luce solare diretta [1] .
Idee di visualizzazione per l'impatto
Per un look raffinato, raggruppa i mandala in base ai materiali utilizzati, ad esempio abbinando design ispirati alla tecnologia con elementi di circuiti stampati. Organizzarli in collezioni tematiche può evidenziare la sostenibilità e creare una forte impressione visiva [5] .
Conclusione
Realizzare mandala con materiali riciclati unisce arte, consapevolezza ed eco-coscienza. Progetti come trasformare vecchi CD in vivaci acchiappa-luce o usare circuiti stampati per disegni intricati mostrano come oggetti di uso quotidiano possano trasformarsi in arte meditativa e significativa. Inoltre, questo approccio può ridurre i rifiuti domestici fino al 15% [8] .
L'utilizzo di materiali come pagine di riviste o elettronica obsoleta spinge gli artisti a vedere i rifiuti sotto una nuova luce. Che tu stia realizzando motivi metallici da circuiti stampati o disegni colorati da CD, le opportunità creative sono vaste.
I modelli digitali di Blululi semplificano la pianificazione dei tuoi progetti prima di tuffartici dentro [7] . La loro libreria di modelli di mandala disegnati a mano è una grande fonte di ispirazione, che mostra simmetria e dettagli intricati che possono guidare le tue creazioni riciclate.
Anche le imperfezioni, come la consistenza dei vecchi tappi di sughero o la stampa sbiadita dei giornali, aggiungono profondità e carattere al tuo lavoro. Creando questi pezzi, non stai solo realizzando una bella arte, stai anche contribuendo a un pianeta più verde con progetti come timbri di tappi di sughero o fiori di cartone delle uova.