Mandalas combine art and mindfulness, helping reduce stress and boost creativity. Studies show that creating mandalas for just 10-20 minutes can ease anxiety and promote focus. Here's how to start:
- Gather Your Tools: Use fine-tipped pens, pencils, erasers, rulers, and heavy paper. Optional tools like a compass or digital apps can enhance precision.
- Create a Grid: Sketch a base with a center point, cross axes, diagonal lines, and guide circles for symmetry.
- Add Patterns: Start with simple shapes (circles, triangles, petals) and layer details for depth and balance.
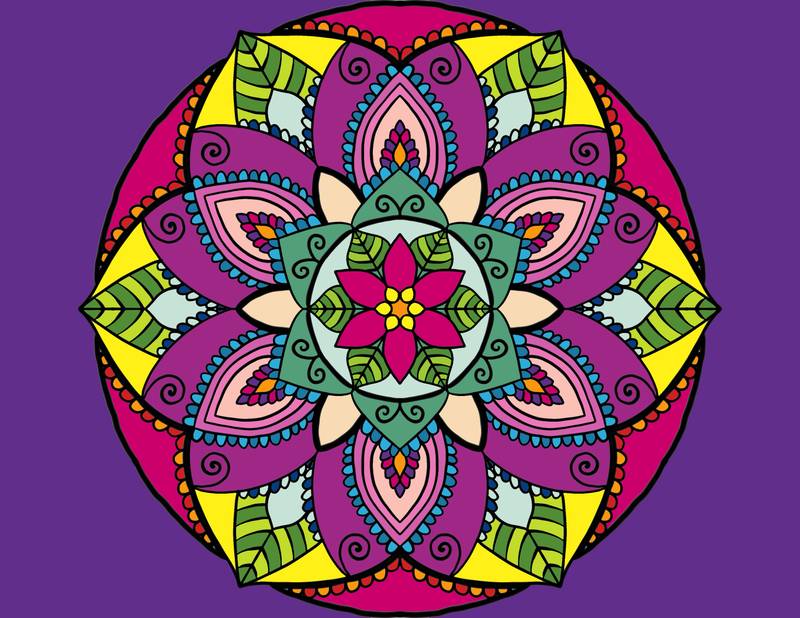
- Incorporate Colors: Use a palette of 3-5 colors, blending shades for depth. Digital tools can help explore endless combinations.
- Make It a Habit: Dedicate 10-15 minutes daily, track your progress, and pair drawing with existing routines.
Why It Works
Mandalas encourage mindfulness by engaging your mind in repetitive, symmetrical designs. This practice is simple to start and grows with your creativity.
Ready to begin? Start small, stay consistent, and let your creativity flow!
200 Easy Mandala Patterns for Beginners | Part 1
Step 1: Get Your Drawing Tools
Start with simple tools that can support your progress as you improve.
Essential Tools to Begin
Fine-tipped pens (0.1-0.5mm) are great for creating detailed and clean lines.
| Tool | Purpose | Suggestions |
|---|---|---|
| Paper | Drawing surface | Bristol or heavyweight paper (100+ gsm) |
| Pencils | Sketching basics | 2H, HB, and 2B graphite pencils |
| Eraser | Fixing mistakes | White plastic eraser |
| Ruler | Straight edges | 12-inch ruler |
| Fine-tipped pens | Finalizing artwork | 0.1mm, 0.3mm, and 0.5mm black pens |
You can also use everyday items for some tasks:
- Plates, cups, or bottle caps for circles
- Dental floss for straight guidelines
- Free protractor apps to divide sections
Optional Tools for Advanced Work
Once you're comfortable, you might want to try tools that add precision and style to your mandalas:
- Compass Set: Perfect for drawing circles and ensuring even shapes
- Protractor: Divides your mandala into accurate sections
- French Curves: Helps create smooth, flowing lines
- Grid Templates: Keeps spacing and alignment consistent (like those from Blululi)
If you're into digital art, consider investing in a drawing tablet or using symmetry-focused software to broaden your options.
Pro tip: Keep your tools organized by storing them in a pencil case or small art box. This makes it easy to grab everything when inspiration strikes.
Once your tools are ready, you'll be set to move on to Step 2 and start building your mandala's foundation.
Step 2: Draw Your First Base Shape
Now that your tools are ready (as covered in Step 1), place your paper at the center of your workspace. This initial setup helps you focus before diving into the design.
Creating the Grid
Start by sketching a grid to guide your mandala. Here's how each element helps:
| Grid Element | Purpose | How to Create |
|---|---|---|
| Center Circle | Defines boundaries | Use a compass or template |
| Cross Axes | Divides the circle | Draw intersecting lines through the center |
| Diagonal Lines | Adds more sections | Draw lines at 45-degree angles |
| Guide Circles | Spaces patterns | Draw concentric circles within the main circle |
Achieving Balanced Shapes
Artist Sarah Renae Clark suggests marking 8 evenly spaced points for symmetry[3].
To keep your shapes consistent:
- Work on one section at a time, rotating the paper for comfort.
- Use light pencil strokes first, darkening them once you're happy with the layout.
- Fold the paper into quarters to check symmetry between sections.
Pro Tip: Digital tools can make it easier to achieve precise lines and symmetry.
For a balanced design:
- Start at the center and work outward.
- Anchor your wrist on the table for steady movements.
- Use the grid lines as your guide throughout the process.
Your first base shape doesn't need to be overly detailed. A simple circle divided into eight sections is enough to provide a solid framework for your patterns. Once you're comfortable, you can try more complex divisions and shapes to add variety.
Step 3: Fill in Your Patterns
Now that your grid is ready, it's time to bring it to life with patterns. Here's how to get started:
Basic Pattern Shapes
Begin with simple shapes that serve as the foundation of your mandala:
| Shape | Purpose |
|---|---|
| Circles | Act as central focal points |
| Triangles | Guide the eye inward or outward |
| Petals | Add flowing, floral-like elements |
Tip: Start with larger shapes, then layer smaller details within them for depth.
To ensure your patterns are smooth and symmetrical:
- Divide your mandala into equal radial sections.
- Reflect patterns along your grid lines for symmetry.
- Keep spacing consistent between elements.
This methodical repetition creates the calming, meditative feel that mandalas are known for.
Complex Pattern Ideas
Once you're comfortable with the basics, try adding more intricate designs to elevate your mandala:
- Interlocking Shapes: Overlap circles or triangles for geometric complexity.
- Nature-Inspired Elements: Add leaves, waves, or spirals for an organic touch.
- Line and Texture Play: Experiment with varying line thickness and spacing for added dimension.
- Strategic Negative Space: Leave intentional gaps to enhance the overall design.
To avoid overcrowding, focus on balancing negative space effectively [1][2][3].
For a polished result:
- Lightly sketch your designs in pencil first.
- Reflect patterns across your grid for symmetry.
- Keep spacing consistent to maintain harmony.
Studying well-crafted mandalas can give you inspiration for balancing detail with clarity. At this stage, every stroke becomes an opportunity to focus your mind, turning the process into a meditative experience.
sbb-itb-b6c1dc0
Step 4: Add Color to Your Design
Now that you've set your patterns in Step 3, it's time to bring them to life with thoughtful color choices.
Basic Coloring Methods
Start with a simple palette of 3-5 colors to complement the patterns you've created:
| Scheme | Best For |
|---|---|
| Monochromatic | Practicing shading |
| Analogous | Smooth, natural blends |
| Complementary | Eye-catching contrasts |
Here are some tips to refine your coloring technique:
- Start from the center and work outward.
- Gradually layer your colors to build depth.
- Leave some white space for balance and contrast.
Pro Tip: Colored pencils are perfect for control and blending. They let you adjust intensity and create seamless transitions between shades.
Try experimenting with one color method each day to sharpen your skills and develop consistency.
Digital Coloring Options
Digital tools are a great way to explore endless color combinations without using up physical materials. Just like the grid templates mentioned in Step 1, Blululi's printables can help keep your experiments organized while testing out different palettes.
Did you know? A study from Knox College found that coloring mandalas for just 20 minutes reduced anxiety by 14.9 points more than free-form drawing [1].
Color Psychology Basics:
- Blues and greens: Encourage calm and relaxation.
- Purples: Foster a sense of spirituality.
- Warm tones (reds, oranges): Energize and spark creativity.
Step 5: Make It a Daily Habit
Creating a regular mandala drawing routine takes dedication, but the benefits can be life-changing. In fact, a study found that 81% of participants in a 30-day mandala drawing challenge experienced reduced stress levels [2].
Schedule Your Drawing Time
Start small - dedicate 10-15 minutes a day to drawing mandalas. Pick a time when you're naturally more relaxed and open to creativity. Here are some ideal options:
| Time of Day | Why It Works |
|---|---|
| Early Morning | Helps you start the day with calm and focus |
| Lunch Break | Provides a mental reset and energy boost |
| Evening | Encourages reflection and unwinding after a busy day |
Tip: Pair mandala drawing with an existing habit, like sipping your morning coffee or wrapping up a meditation session. Keeping your supplies in a ready-to-go kit can also help you avoid any setup hassles.
Track Your Progress
Use a method that keeps you motivated:
- Habit-tracking apps can send helpful reminders.
- Take daily photos to create a visual record of your journey.
- Keep a journal to log patterns, moods, and personal insights.
Blululi's Self-Care Bundle, mentioned earlier, includes tools specifically designed for mindful practices like mandala drawing. Use these to track not just your progress but also how your emotional state evolves over time.
Remember: It's not about achieving perfection. It's about building a rhythm that keeps you going [2].
Start Your Mandala Journey
Now that you've worked through these five steps, you're set to embrace mindfulness through a daily mandala practice. By building grids (Step 2) and advancing your patterns (Step 3), you're on your way to crafting a unique visual style.
Start Simple, Build Confidence
Focus on easy designs at first. Over time, as you feel more comfortable, you can explore more intricate patterns. The key here is consistency - simple patterns can be just as meaningful as detailed ones when it comes to mindfulness.
Essential Tools for the Process
Traditional tools, as discussed in Step 1, are a great starting point. As you grow in your practice, digital tools can be a fun way to experiment and expand your creative options.
Keeping the Habit Alive
Turn your mandala practice into a daily ritual by:
- Setting up a drawing space that sparks creativity
- Using Step 5's tips to schedule regular sessions
- Connecting with online mandala communities for fresh ideas
- Tracking your progress, as outlined in Step 5
Whether you're using pen and paper or a digital tablet, the most important thing is to stay consistent and let your style develop naturally. Keep experimenting, and let your creativity flow!
FAQs
What is the mandala technique?
The mandala technique involves creating patterns that radiate outward from a central point, using geometric shapes. It's often used for artistic expression and stress relief [4]. The term "mandala" comes from Sanskrit and translates to "circle" or "center" [4].
Unlike freeform drawing, this method follows clear guidelines:
- Central Point: Begin at the center and expand outward.
- Balanced Patterns: Ensure the design is evenly repeated.
- Geometric Structure: Focus on organized shapes and patterns.
Examples of Patterns and Their Meanings:
| Pattern | Meaning |
|---|---|
| Circles | Unity and infinity |
| Squares | Stability and balance |
| Triangles | Energy and direction |
| Spirals | Growth and evolution |
For those new to this technique, it's best to start with simple shapes. It can suit any skill level - ranging from easy designs to intricate patterns. Modern tools, like Blululi's Python-scripted designs, also allow artists to bring a digital twist to this traditional method, as highlighted in Step 4's digital coloring options.